Assessing Cabinet Needs and Choosing Doors

So, you’ve got some lovely open cabinets, and now you’re ready to give them the sophisticated, grown-up look of actual doors. Excellent choice! Let’s get this show on the road and transform your haphazard storage into a thing of beauty. This section will guide you through choosing the perfect doors and hardware to complete your cabinet makeover.
Cabinet Door Material Selection and Aesthetic Considerations
Choosing the right cabinet door material is a bit like picking a pet – it’s a long-term commitment! You’ll want to consider not only aesthetics but also durability, maintenance, and, let’s be honest, your budget. Here’s a handy comparison to help you navigate this crucial decision:
| Material | Cost | Aesthetics | Durability |
|---|---|---|---|
| Solid Wood | High | Classic, elegant, versatile; can be stained or painted | High; durable and long-lasting with proper care |
| Medium-Density Fiberboard (MDF) | Medium | Smooth surface, ideal for painting; can mimic wood grain | Medium; susceptible to moisture damage; less durable than solid wood |
| Glass | Medium to High (depending on type) | Modern, sleek, allows for light penetration; can be frosted or textured | Medium; can break; requires careful handling |
| Thermofoil | Low to Medium | Variety of colors and finishes; easy to clean; resists moisture | Medium; can chip or peel with rough handling |
Note that cost is relative and can vary based on factors like size, style, and retailer.
Precise Cabinet Measurements and Door Sizing
Measuring your cabinet openings accurately is paramount. A millimeter off, and you’ll be cursing your shoddy measurements while wrestling with ill-fitting doors. Follow these steps like a seasoned carpenter (even if you’re not):
- Clear the Coast: Remove any obstacles from the cabinet opening – shelves, dishes, that questionable jar of pickles from 1998. You need a clear view.
- Height and Width: Measure the height and width of the opening at multiple points. Don’t just measure once! Cabinets can be a little… temperamental. Record the smallest measurement for each dimension – this ensures a snug fit.
- Depth: Measure the depth of the cabinet. This determines how far the door will extend from the opening. Remember to account for any existing cabinet framing.
- Check for Irregularities: Examine the opening for any imperfections – uneven surfaces, gaps, or wonky framing. Note these down; you may need to adjust your measurements or door installation technique.
- Double-Check (Seriously!): Measure again. And again. Trust me, you’ll thank me later.
Remember, precision is key! A poorly measured door is a recipe for frustration and potentially damaged cabinets.
Choosing Complementary Hinges and Handles
Now for the fun part: picking the hardware! Hinges and handles are the jewelry of your cabinet makeover. The right ones can elevate your entire design.
How to add doors to an open cabinet – Hinge Types:
- Overlay Hinges: These are the most common type, where the door completely covers the cabinet frame.
- Inset Hinges: These are for a more sophisticated look, where the door sits flush with the cabinet frame.
- European Hinges: Known for their durability and adjustability, these are usually cup-style hinges.
Handle Designs:
- Knobs: Classic and versatile, they come in a myriad of styles and materials.
- Pulls: Offer a more contemporary look and are easier to grip, especially for larger doors.
- Bar Handles: A sleek, minimalist choice that often suits modern cabinets.
Consider the overall style of your kitchen and the doors you’ve chosen when selecting your hinges and handles. A modern handle on a classic shaker door might look a little…off.
Installing the Cabinet Doors: How To Add Doors To An Open Cabinet

So, you’ve chosen your gorgeous doors and are ready to transform your open cabinet into a thing of beauty (or at least, a thing with doors). Let’s get those hinges swinging! This isn’t brain surgery, but a little precision goes a long way. Think of it as a delicate dance between wood and metal – a waltz, if you will, with a happy ending of perfectly aligned doors.
Attaching Hinges to Cabinet Doors and Frames
The type of hinge you choose dictates the installation method, but the general principle remains: accuracy is key. We’ll explore a few common hinge types and their installation techniques. Remember, a little pre-drilling can prevent wood splitting – always a good idea, especially if you’re working with hardwood.
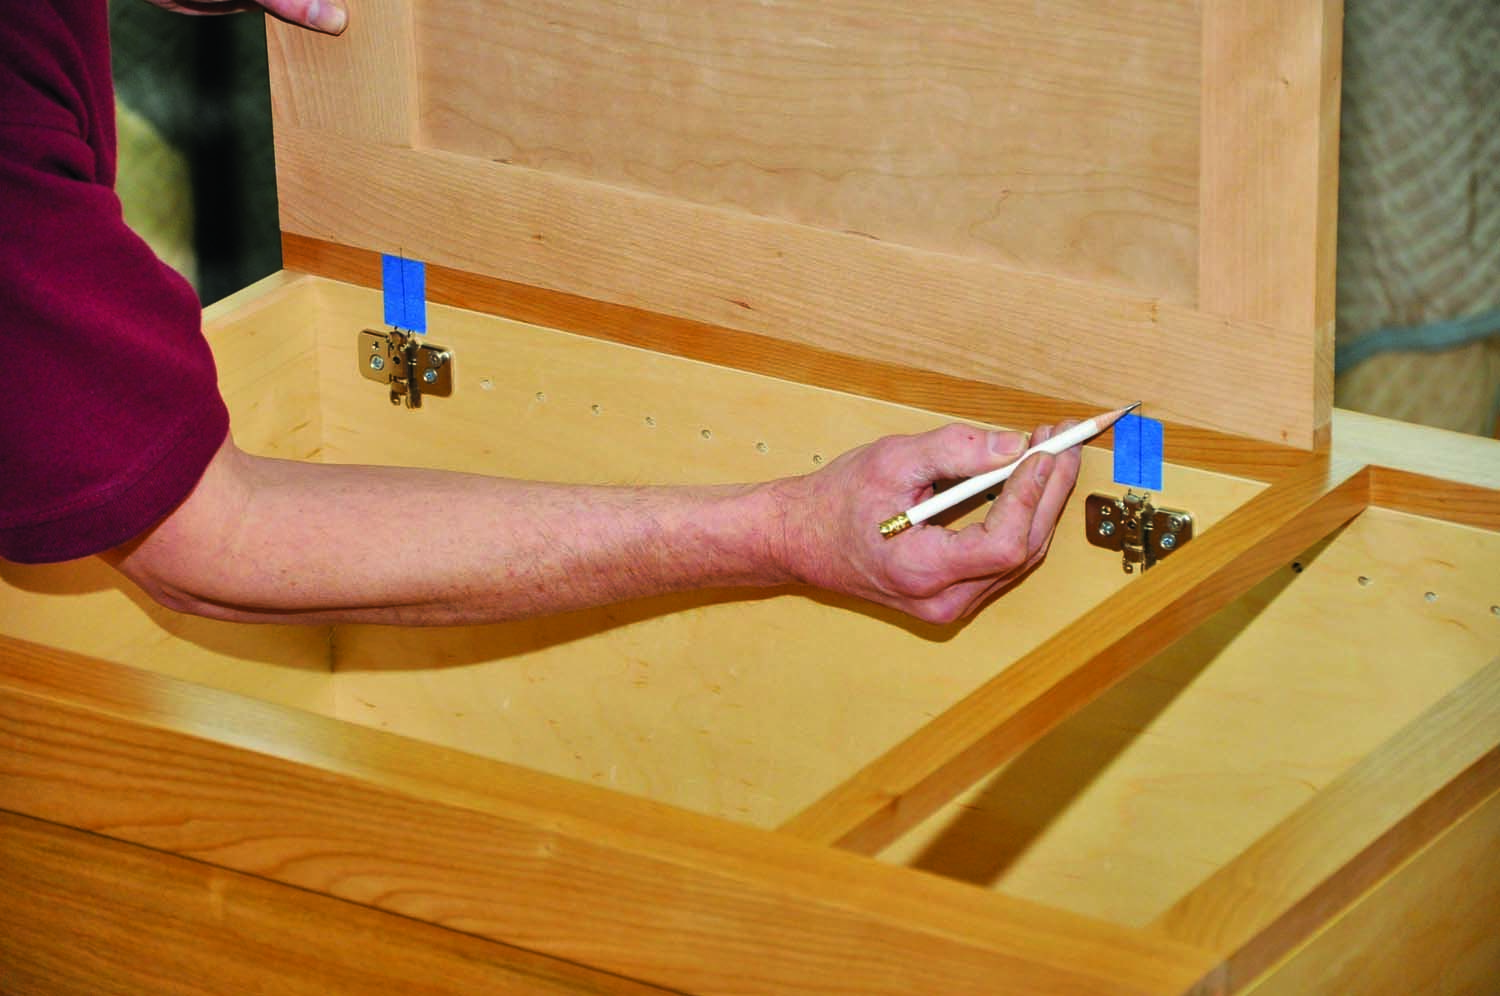
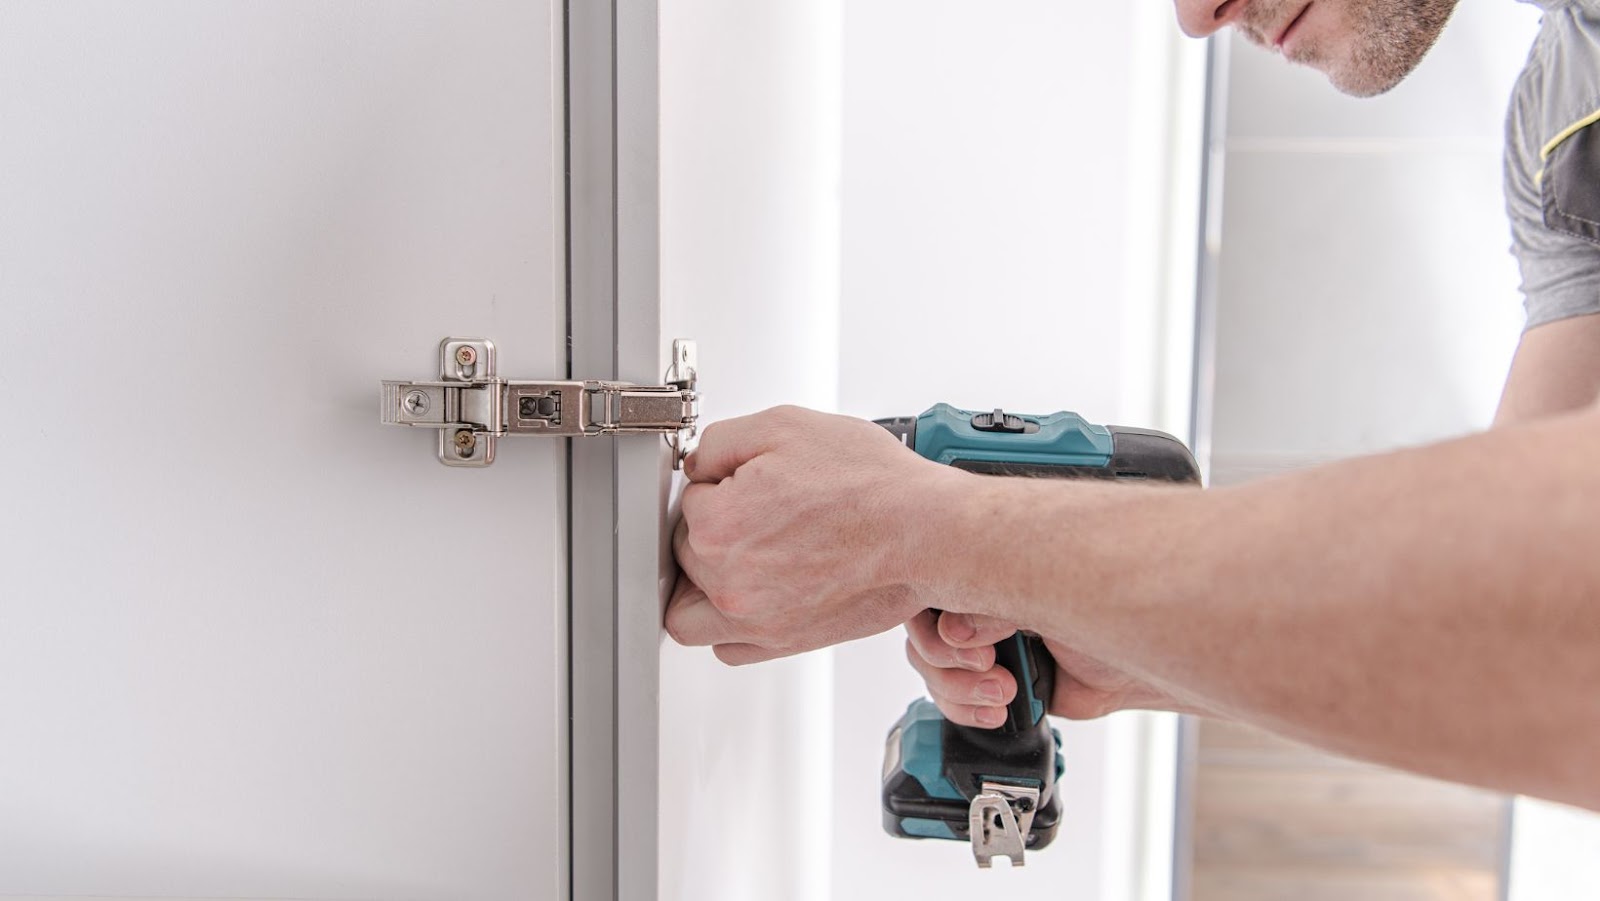
- Overlay Hinges: These are the workhorses of the cabinet world, allowing the door to overlap the cabinet frame. Installation typically involves marking hinge placement on both the door and the frame, using a self-centering hinge jig (for perfect alignment, of course!), pre-drilling pilot holes, and then screwing the hinge plates securely in place. Imagine a tiny, perfectly calibrated hug between the hinge and the wood.
- Inset Hinges: For a more seamless, flush look, inset hinges are your friend. These require precise mortising (cutting a recess) into both the door and the frame to house the hinge. A router with a mortise bit makes this process much easier. Think of it as creating a cozy little nest for the hinge to snuggle into.
- European Hinges: Known for their sleek profile and adjustability, these hinges mount directly to the inside of the cabinet frame and the door, often using cup-shaped recesses. They are typically easier to install than inset hinges, requiring less precision in the mortising process. Picture these as the sophisticated cousins of the overlay hinges, offering elegance and ease of use.
Installing Cabinet Door Hardware
Now for the finishing touches – the knobs and pulls that add personality and practicality to your newly-doored cabinet. Proper placement and secure fastening are crucial here. We don’t want any wobbly knobs or handles causing a dramatic, and potentially painful, cabinet door collapse.
- Knobs: Generally installed through a single hole, knobs are simple to attach. Mark the desired location, pre-drill a pilot hole (to avoid splitting the wood), and screw the knob into place. Ensure the screw is long enough to provide a secure grip, but not so long that it protrudes through the other side.
- Pulls: Pulls require two holes, usually positioned symmetrically. Mark the locations, pre-drill pilot holes, and then carefully screw the pull’s mounting plate to the door. Make sure the screws are snug to prevent the pull from becoming loose over time. Consider the weight of the door and choose appropriately sized screws for added stability. A perfectly aligned pull is a thing of beauty.
Adjusting Hinges for Proper Door Alignment, How to add doors to an open cabinet
Even with meticulous installation, minor adjustments might be needed to achieve perfect door alignment. Most hinges offer a degree of adjustability – allowing you to fine-tune the door’s position.
- Troubleshooting Sticking Doors: A sticking door often indicates the hinges need adjustment. Most hinges have screws that allow for vertical, horizontal, and depth adjustments. Tightening or loosening these screws can rectify the issue. Think of it as a tiny, finely tuned machine that can fix minor alignment problems.
- Gaps Between Doors: Uneven gaps between doors suggest a need for hinge adjustment. By carefully adjusting the hinges, you can close these gaps and achieve a perfectly aligned, and aesthetically pleasing, cabinet front.
Finishing Touches and Refinements

So, your cabinet doors are on! You’ve conquered the slightly terrifying world of hinges and screws, and your kitchen (or bathroom, or wherever your brave handiwork resides) is looking significantly less… unfinished. But hold your horses, intrepid DIYer! The final flourish is what truly elevates a project from “functional” to “fabulous.” Let’s add those finishing touches that will make your cabinets look like they were installed by a team of tiny, highly skilled wood elves.
The key to a professional-looking finish lies in meticulous attention to detail. Think of it as the difference between a hastily applied coat of paint and a perfectly smooth, gleaming masterpiece. This section will guide you through the process of concealing any imperfections and ensuring your new doors blend seamlessly with the existing cabinetry.
Gap Filling and Sealing
Inevitably, there will be small gaps or imperfections where the new doors meet the cabinet frame. These are often barely noticeable, but they can become havens for dust and grime, and they detract from the overall polished look. The solution? Filling and sealing, of course!
The best filler depends on the material of your cabinets. For wood cabinets, a high-quality wood filler is ideal. Choose a filler that matches the color of your cabinets as closely as possible. Apply the filler using a putty knife, pressing it firmly into the gaps. Once it’s dry (check the manufacturer’s instructions!), carefully sand it smooth with fine-grit sandpaper. For melamine or other similar materials, a paintable caulk designed for interior use is usually the best option. Apply it neatly, using a caulking gun, and smooth it out with a damp finger or a caulking tool. Let it dry completely before sanding lightly if necessary.
After filling, sealing is crucial. A good quality wood sealant (for wood cabinets) or a paint sealant (for other materials) will protect the filled areas and prevent moisture damage. Apply the sealant according to the manufacturer’s instructions, ensuring complete coverage of the filled areas. This final step adds a protective barrier and enhances the overall durability and appearance of your cabinet doors. For example, if you used a water-based wood filler on oak cabinets, a water-based sealant would be the most compatible choice. Conversely, oil-based fillers would pair well with oil-based sealants.
Tools and Materials for a Professional Finish
Gathering the right tools and materials beforehand is essential for a smooth and efficient process. Improvising mid-project can lead to frustration and less-than-stellar results. Let’s get organized!
- Wood Filler (for wood cabinets): Choose a color that closely matches your cabinets. Pre-colored fillers save you a sanding step later.
- Paintable Caulk (for melamine or other non-wood cabinets): Opt for a paintable caulk that’s designed for interior use.
- Putty Knife: For applying wood filler neatly.
- Caulking Gun: For applying caulk precisely.
- Fine-Grit Sandpaper: For smoothing out the filler or caulk.
- Sanding Block (optional): Makes sanding easier and more even.
- Wood Sealant (for wood cabinets): Protects the wood and enhances its appearance.
- Paint Sealant (for other materials): Protects the surface and ensures durability.
- Tack Cloth: For removing dust before sealing.
- Clean Rags: For wiping away excess filler, caulk, or sealant.
Remember, selecting the right materials is half the battle. Investing in high-quality products will significantly impact the final outcome. Don’t skimp on the good stuff!
